SAML Integration
This guide covers SAML SSO between Bicycle and your identity provider (IdP). The same pattern works with major providers including Okta, Google Workspace, and Microsoft Entra ID (Azure AD).
Provider-specific walkthroughs:
Overview
Setup has two parts:
- Identity Provider (IdP) configuration — groups, SAML app, access
- Bicycle platform configuration — metadata / artefacts, domain, role mapping
Part 1: Identity Provider configuration
Step 1: Create user groups
Bicycle supports three roles: Viewer, Editor, and Admin. Create matching groups in your IdP so users get the right Bicycle role from group membership.
- Open your IdP admin dashboard.
- Create three groups, for example:
BicycleViewers— ViewerBicycleEditors— EditorBicycleAdmins— Admin
Prefix group names with Bicycle or bicycle- so they are easy to find and manage.
- Assign the initial set of users to the appropriate groups.
Step 2: Create the SAML application
- In your IdP admin dashboard, open application / SSO integrations.
- Create a new SAML 2.0 application.
- Download the IdP metadata file (you will upload it in Bicycle, or paste the equivalent fields).
- Configure the service provider settings:
| Setting | Value |
|---|---|
| ACS URL / SSO URL | https://app.bicycle.ai/api-proxy/api/tenants/auth/login/saml/callback |
| SP Entity ID | https://app.bicycle.ai |
- Configure SAML attributes:
| Setting | Value |
|---|---|
| Name ID format | |
| Name ID value | User's primary email |
| Group attribute | Name: groups — include the Bicycle* groups from Step 1 |
Use the Entity ID and ACS URL your Bicycle contact confirms if your environment differs from the defaults above.
Step 3: Configure application access
Enable access to the SAML application using one of:
- Option A: Enable for all users (Everyone)
- Option B: Enable only for the three Bicycle groups from Step 1
Part 2: Bicycle platform configuration
- Sign in to Bicycle as a tenant administrator.
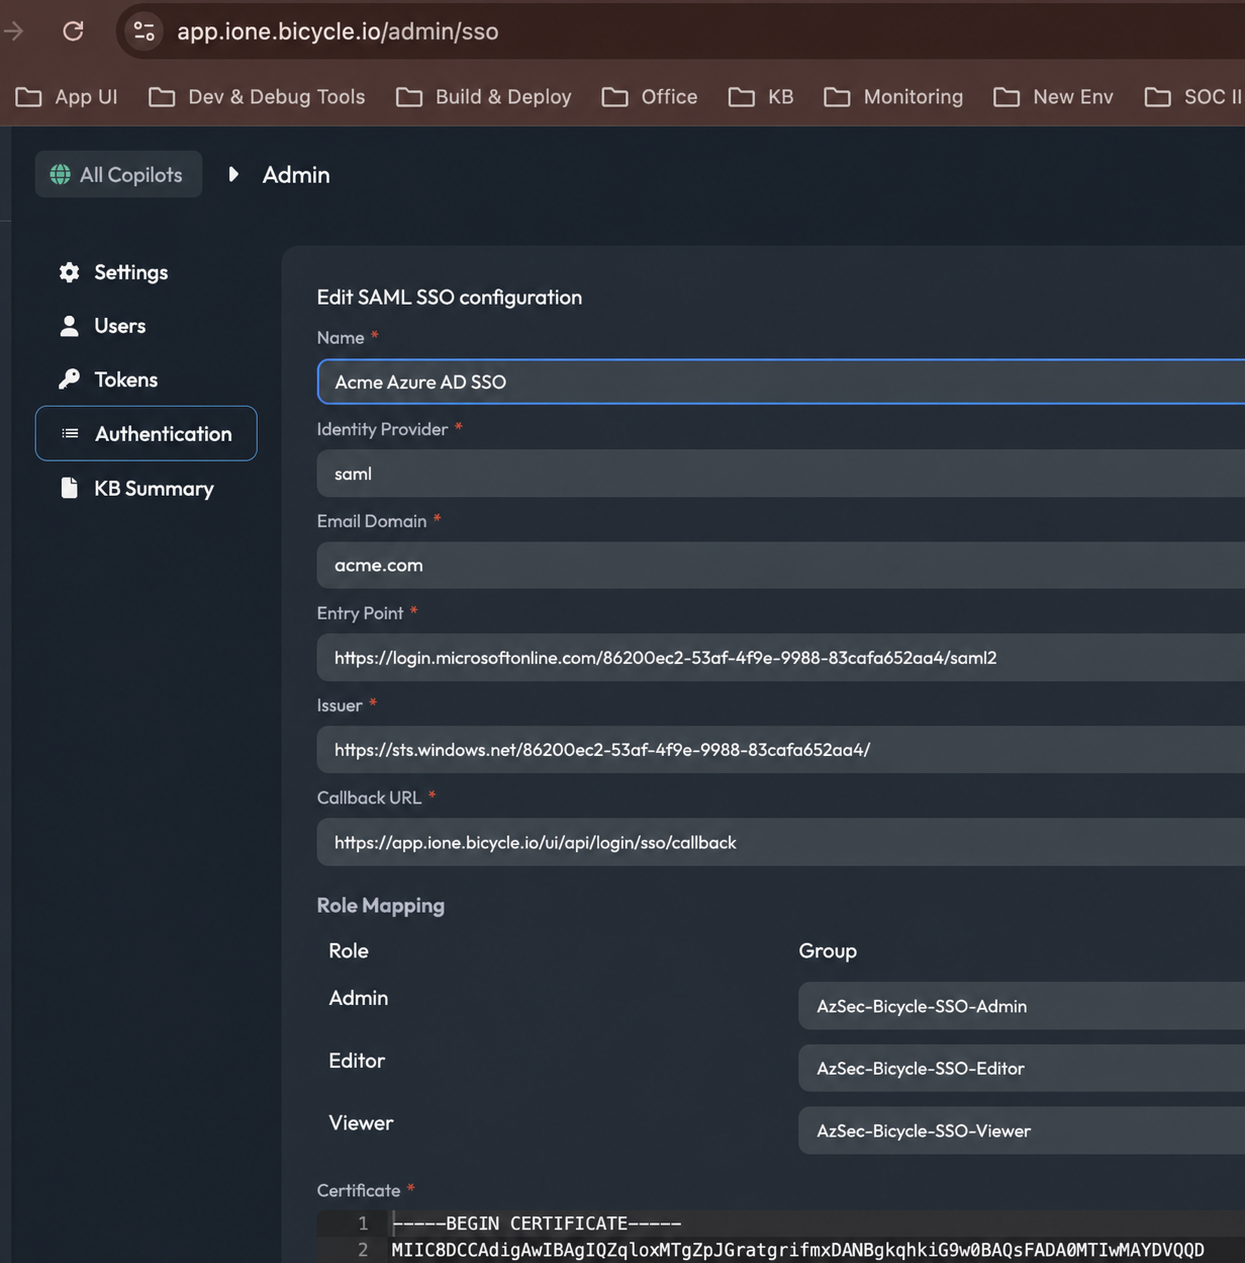
- Open Admin → Authentication (Identity Provisioning / SAML SSO).
- Enable SAML SSO.
- Provide IdP details — either upload the IdP metadata file, or enter:
| Field | Source |
|---|---|
| Entry Point (Login URL) | IdP SSO URL |
| Issuer | IdP entity ID |
| Callback URL | Bicycle ACS URL (usually pre-filled) |
| Certificate | IdP signing certificate (Base64 / PEM) |
| Email domain | Your organization email domain |
- Map IdP groups to Bicycle roles:
| Bicycle role | Example IdP group |
|---|---|
| Admin | BicycleAdmins |
| Editor | BicycleEditors |
| Viewer | BicycleViewers |
- Save the configuration.
Login flows
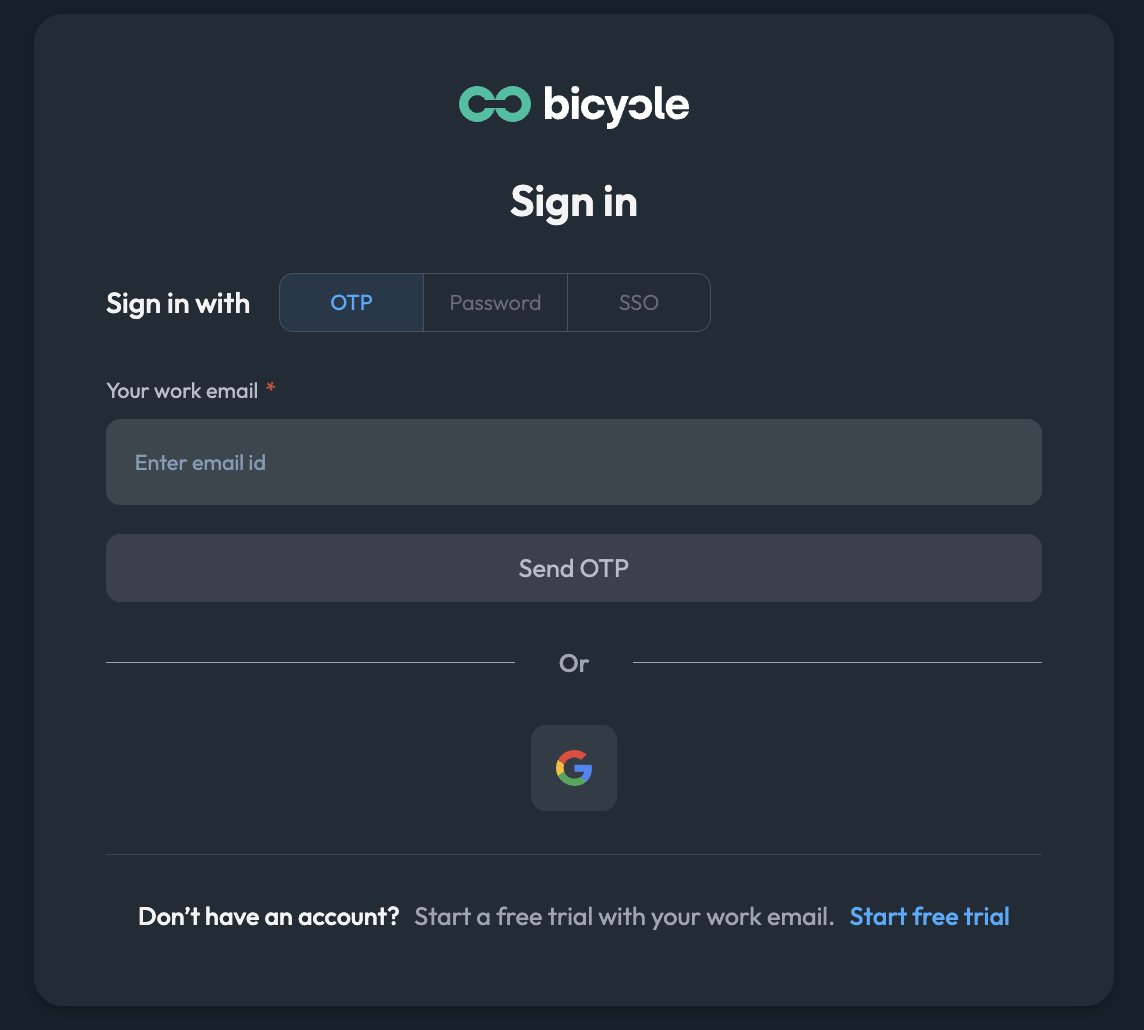
After SSO is enabled, users can sign in via:
| Flow | How users start |
|---|---|
| Tenant login | https://app.bicycle.ai/{tenant}/login → choose SSO |
| Global login | https://app.bicycle.ai/account/login → choose SSO |
| IdP-initiated | Launch Bicycle from your IdP app catalog / My Apps |
User management
To grant additional users access after SAML is live:
- Add the user to the appropriate
Bicycle*group in your IdP. - Confirm they can access the Bicycle SAML application.
- Have them sign in once so Bicycle creates or updates their account.
Troubleshooting
If users cannot sign in:
- Confirm they are in the correct Bicycle group
- Confirm they have access to the Bicycle SAML application
- Confirm their email domain matches the domain configured in Bicycle
- Review IdP authentication logs for errors
Support
For additional help:
- Email support@bicycle.ai
- Consult your IdP’s SAML documentation
- Use a provider-specific guide: Microsoft Entra, Google, or Okta